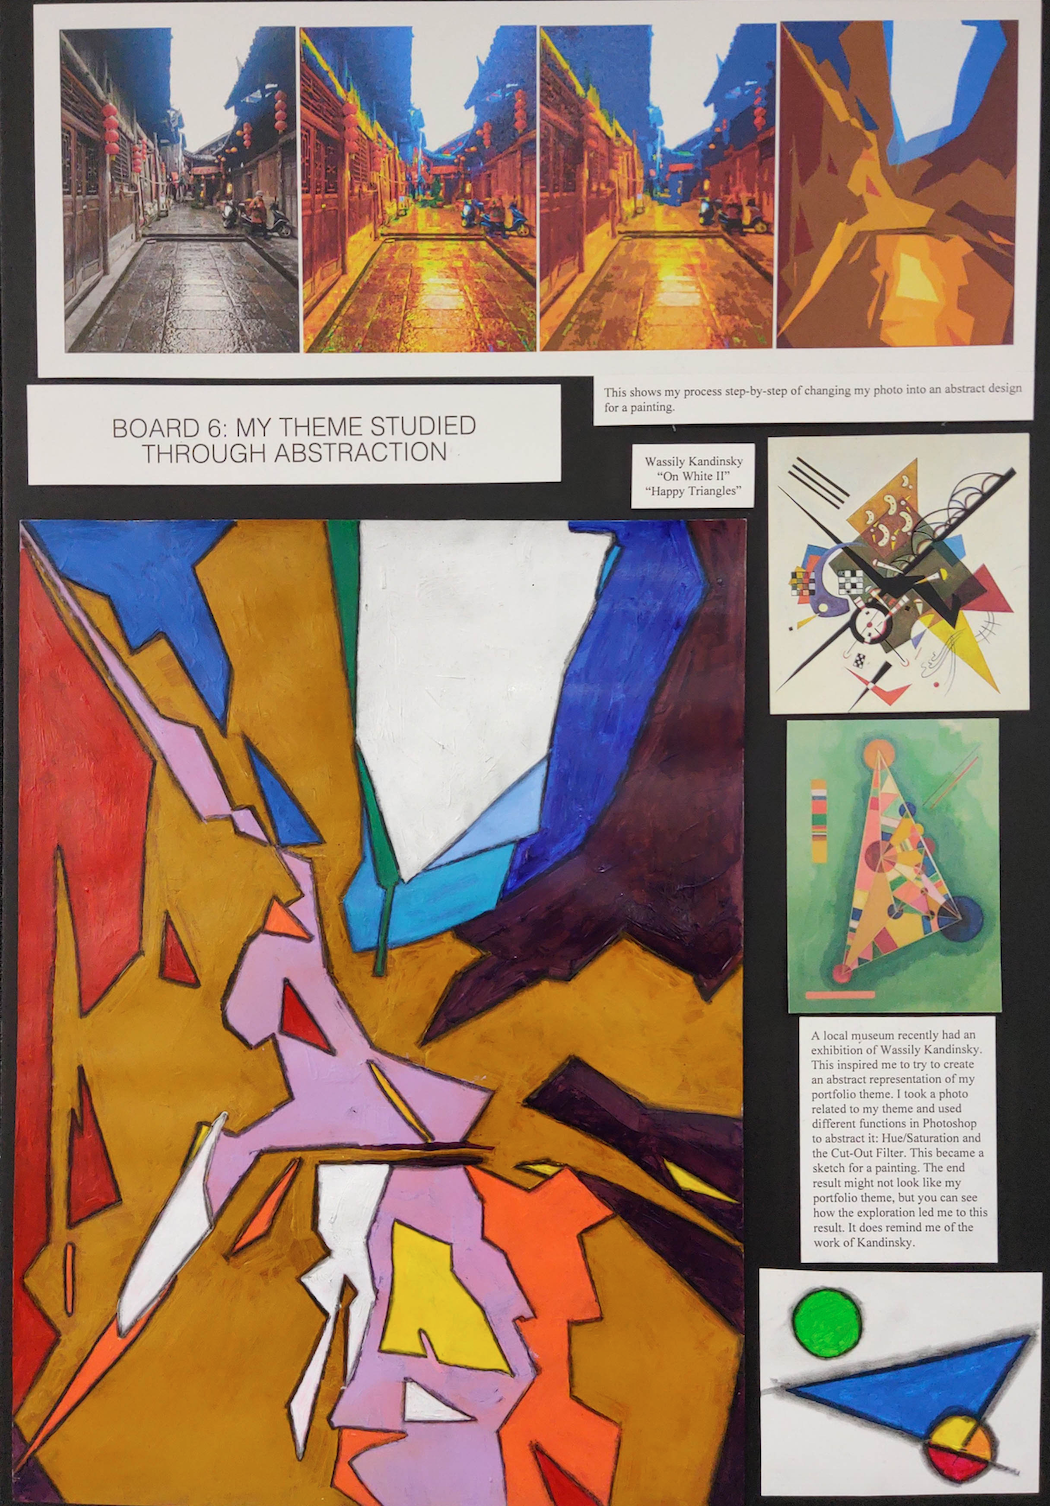
This is a brand new art unit that I started this year and am very excited about. Those who know me, know that I love to teach Photoshop, but love to paint in my personal artistic practice, and this fuses the two! I intentionally take screenshots using Photoshop Elements which is a much cheaper program than Photoshop CS and does many of the same things.
The assignment shows students how to turn a nice photograph into an abstract composition that can later be used as a template for a painting. You could literally print the image on thick paper and then paint right on top of it like it was a coloring book. The primary tools you use in Photoshop are the Hue/Saturation menu and the Cutout Filter. The hue function will change the colors of the photograph and the saturation will make them more vibrant. The Cutout filter is what turns the image abstract. You will want to raise the edge simplicity bar and lower the edge fidelity bar. You could also rotate the image afterwards. The last step is to print it on thick paper and paint on it. You could even change some of the colors in the painting or use different tones. I also recommend outlining the shapes with a charcoal pencil and then using a blending stick to soften the line (which you’ll see in one of the examples below).


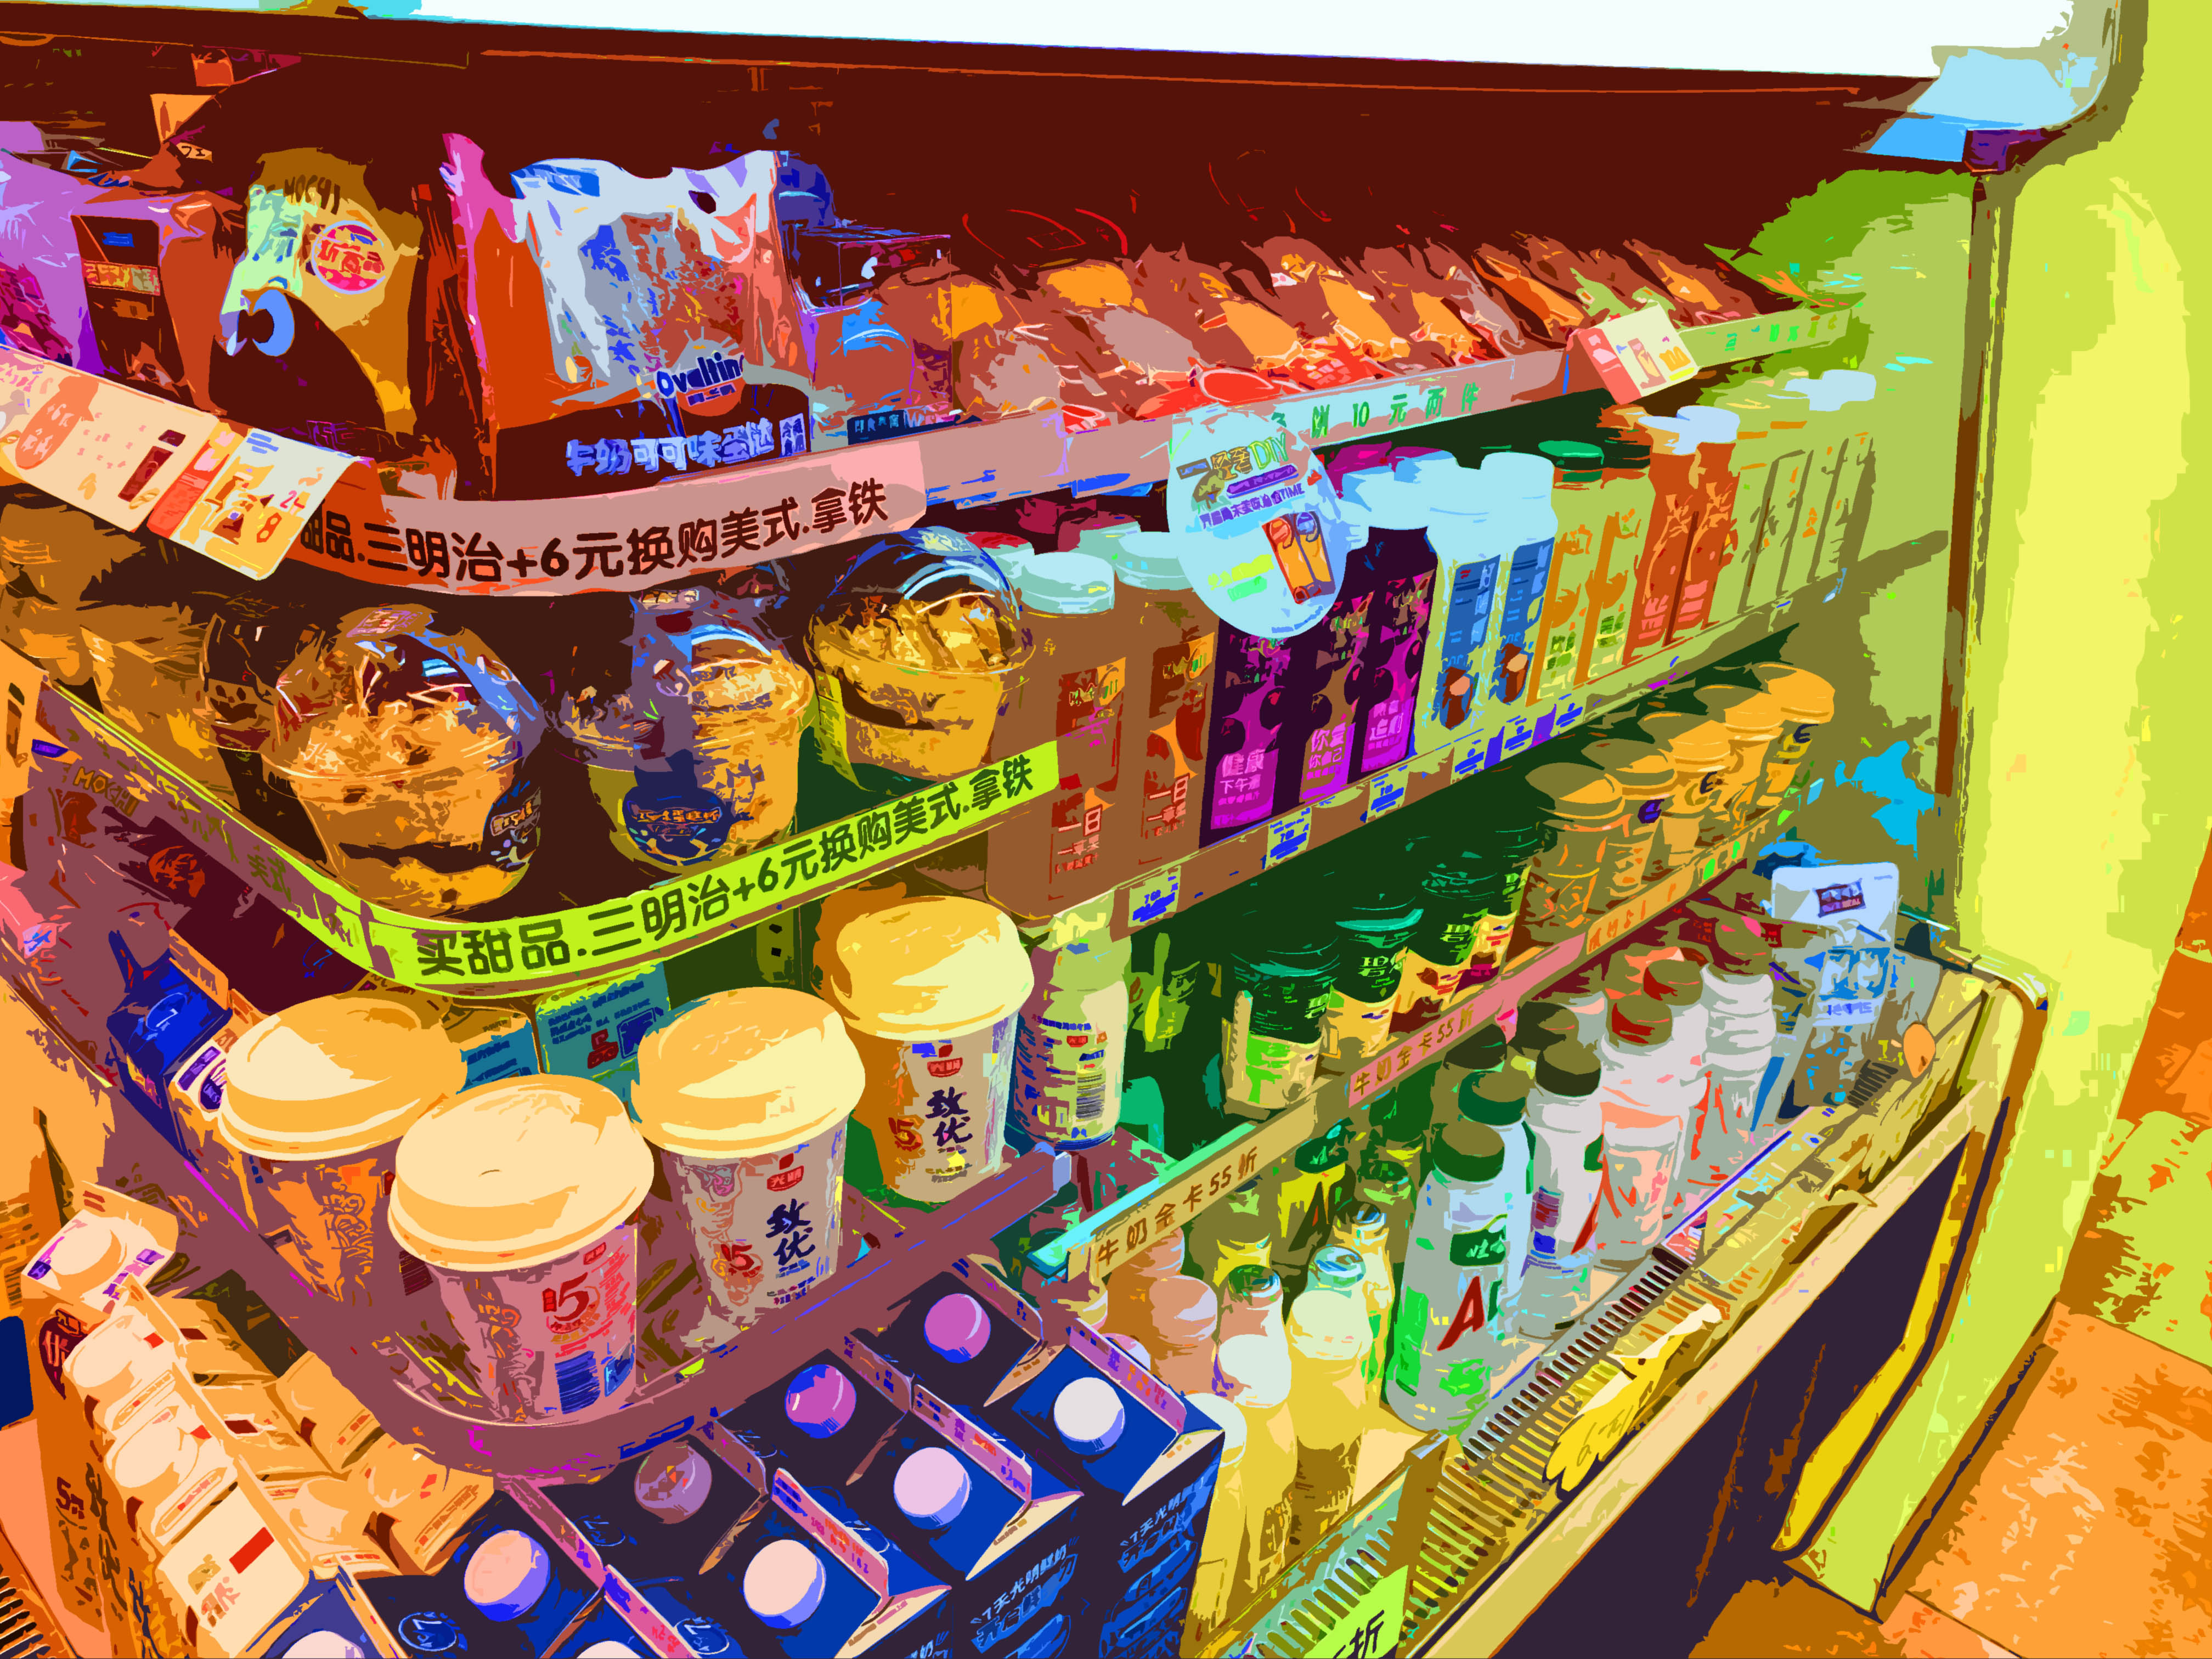
The great things about this is it offers lots for students to show about the creative process. Which is a key component of the criteria in IB Process Portfolios or IGCSE Portfolio Boards. Below are two examples from IGCSE portfolio boards (ignore the unrelated artwork). I recommend pairing this with an artist investigation of Wassily Kandinsky. Below that is a student example of a photo from 7Eleven turned into a very beautiful and complicated abstract image.